 The September 2009 Daring Bakers' Challenge has been chosen by Steph of a whisk and a spoon. Steph chose Vols-au-Vent, which we are pretty sure in French means, “After one bite we could die and go to heaven!”
Get ready for a long post..........
 For this challenge, I had to make this dough twice because I accidentally put too much butter in the dough. That is why my pastries didn't lift the way they were supposed to. They were still very good, just too buttery.


 About to pour the ice water into the mixer. A food processor is on my Christmas wish list (mom! hint. hint.)
Shaped dough from my first attempt.
 The second time around, I halved the recipe. I put in the right amount of butter this time, but the dough looked a bit more crumbly than the first time.
 It smoothed out later, though. Most of the prep photos you see are from my second round.
 I moved my dining/prep table to the window so that I could take pictures of most of the steps.


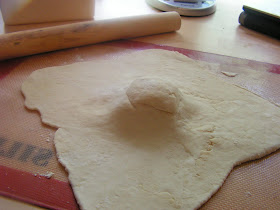


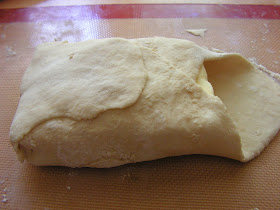
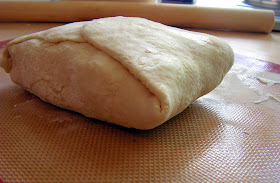

 After making the turns, I stopped taking pictures since it all looked the same.
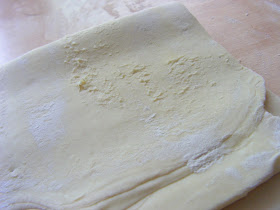 However, at one point, the butter started to melt and stuck to the table.
 In order to remedy the problem, I put flour on the buttery bits, patted it, brushed off the excess flour, and then placed the dough in the refrigerator for a longer period of time.

 Cutting the prepared dough in half. The layers don't look very good...I was kind of scared at this point.
 I am obsessed with the process of making laminated dough. I watched a bunch of youtube videos and a bunch of pictures even though I knew what to do already. It is so fascinating watching the pastry come together and seeing the end result.
 The rest of the dough is sitting in the freezer and probably will be sitting there until it's no longer good just like the danish dough (that is still in the freezer! I need to get that out of there.).

 Steps for making this shaped pastry.
 Eating puff pastry is another story. I'm not crazy about eating it even though it is so good. I guess I like cakes, cookies, and pies more.
 Dough getting ready to be cut, shaped, and baked.
 Despite my fears, the taste of both attempts was exceptional. That is most important in my book!
The pastries on the brown plate come from my first attempt. I placed homemade lemon-lime, cream cheese curd (recipe below) on top with homemade strawberry topping/jam.

 Also, after making all of these pastries, I'm really tired of the stuff haha. Good thing, I only made two or three of them at a time.
 These danishes on the black sheet are from my second attempt. I placed more of the lemon-lime, cream cheese curd on top with homemade strawberry topping/jam.
 The pastries on the white plate also come from my second attempt after sitting in the freezer for a few days. I wanted to see if I could take better pics, but yeah, that didn't happen. For the topping, I placed a scoop of my Mexican Ice cream, whipped cream, and hot fudge (that's no longer smooth as it was when I made it a few weeks ago).
 All in all, the second bit of dough produced a much better pastry. I still wasn't able to make it look as pretty as the others I've seen. Thanks for the great challenge, Steph!
Lemon-Lime Curd with Cream Cheese
adapted from The Knead for Bread
1/4 cup butter
3 large eggs
½ cup sugar
1/2 cup freshly squeezed lime juice (I used 3 limes)
1/2 cup of Mascarpone Cheese (I used cream cheese)
Finely grated zest from 1 limes
Add a cup of water to a pot and bring to a simmer. Place the eggs, sugar, lime zest and lime juice into a metal bowl and whisk together. Place the bowl over the simmering pot of water and whisk till the mixture becomes thick and creamy. Remove from the heat and stir in the butter. Now, add the Mascarpone Cheese and blend together. Pour into a clean container and place plastic wrap on top. Be sure the wrap is touching the top of the curd. This will help to prevent a crust from forming. Place into the fridge for at least 3 hours to overnight.


